
What are your favorite supplies? What pen did you use? What ink is that?
I get so many questions about favorite supplies - what supplies to start out with and why, so I thought I’d put together a list of my personal favorites for calligraphers looking to expand their practice. Much of the time, it’s so easy to miss out on productive practice time by not knowing what’s even available, so I’m hoping this list will introduce you guys to some staple supplies in my inventory that I have used since I was first starting out.
Just a warning, this gets long, so here it is broken into parts: paper, ink, pen & nibs, and other miscellaneous resources.
Paper Recommendations for Calligraphy Beginners (and onward)
HP Laserjet Paper - 32lb - I’m pretty convinced that HP recently changed their “formula” for this paper because I have been finding that my nibs are not writing as well on it. HOWEVER, it is still the best practice paper I’ve come across that won’t break the bank. This paper is great for practice for the Tombow Dual Tips because the smooth surface won’t tear up the brush tips, thus prolonging the life of your Tombows, because those tips are surprisingly delicate and the costs add up when you’re replacing them.
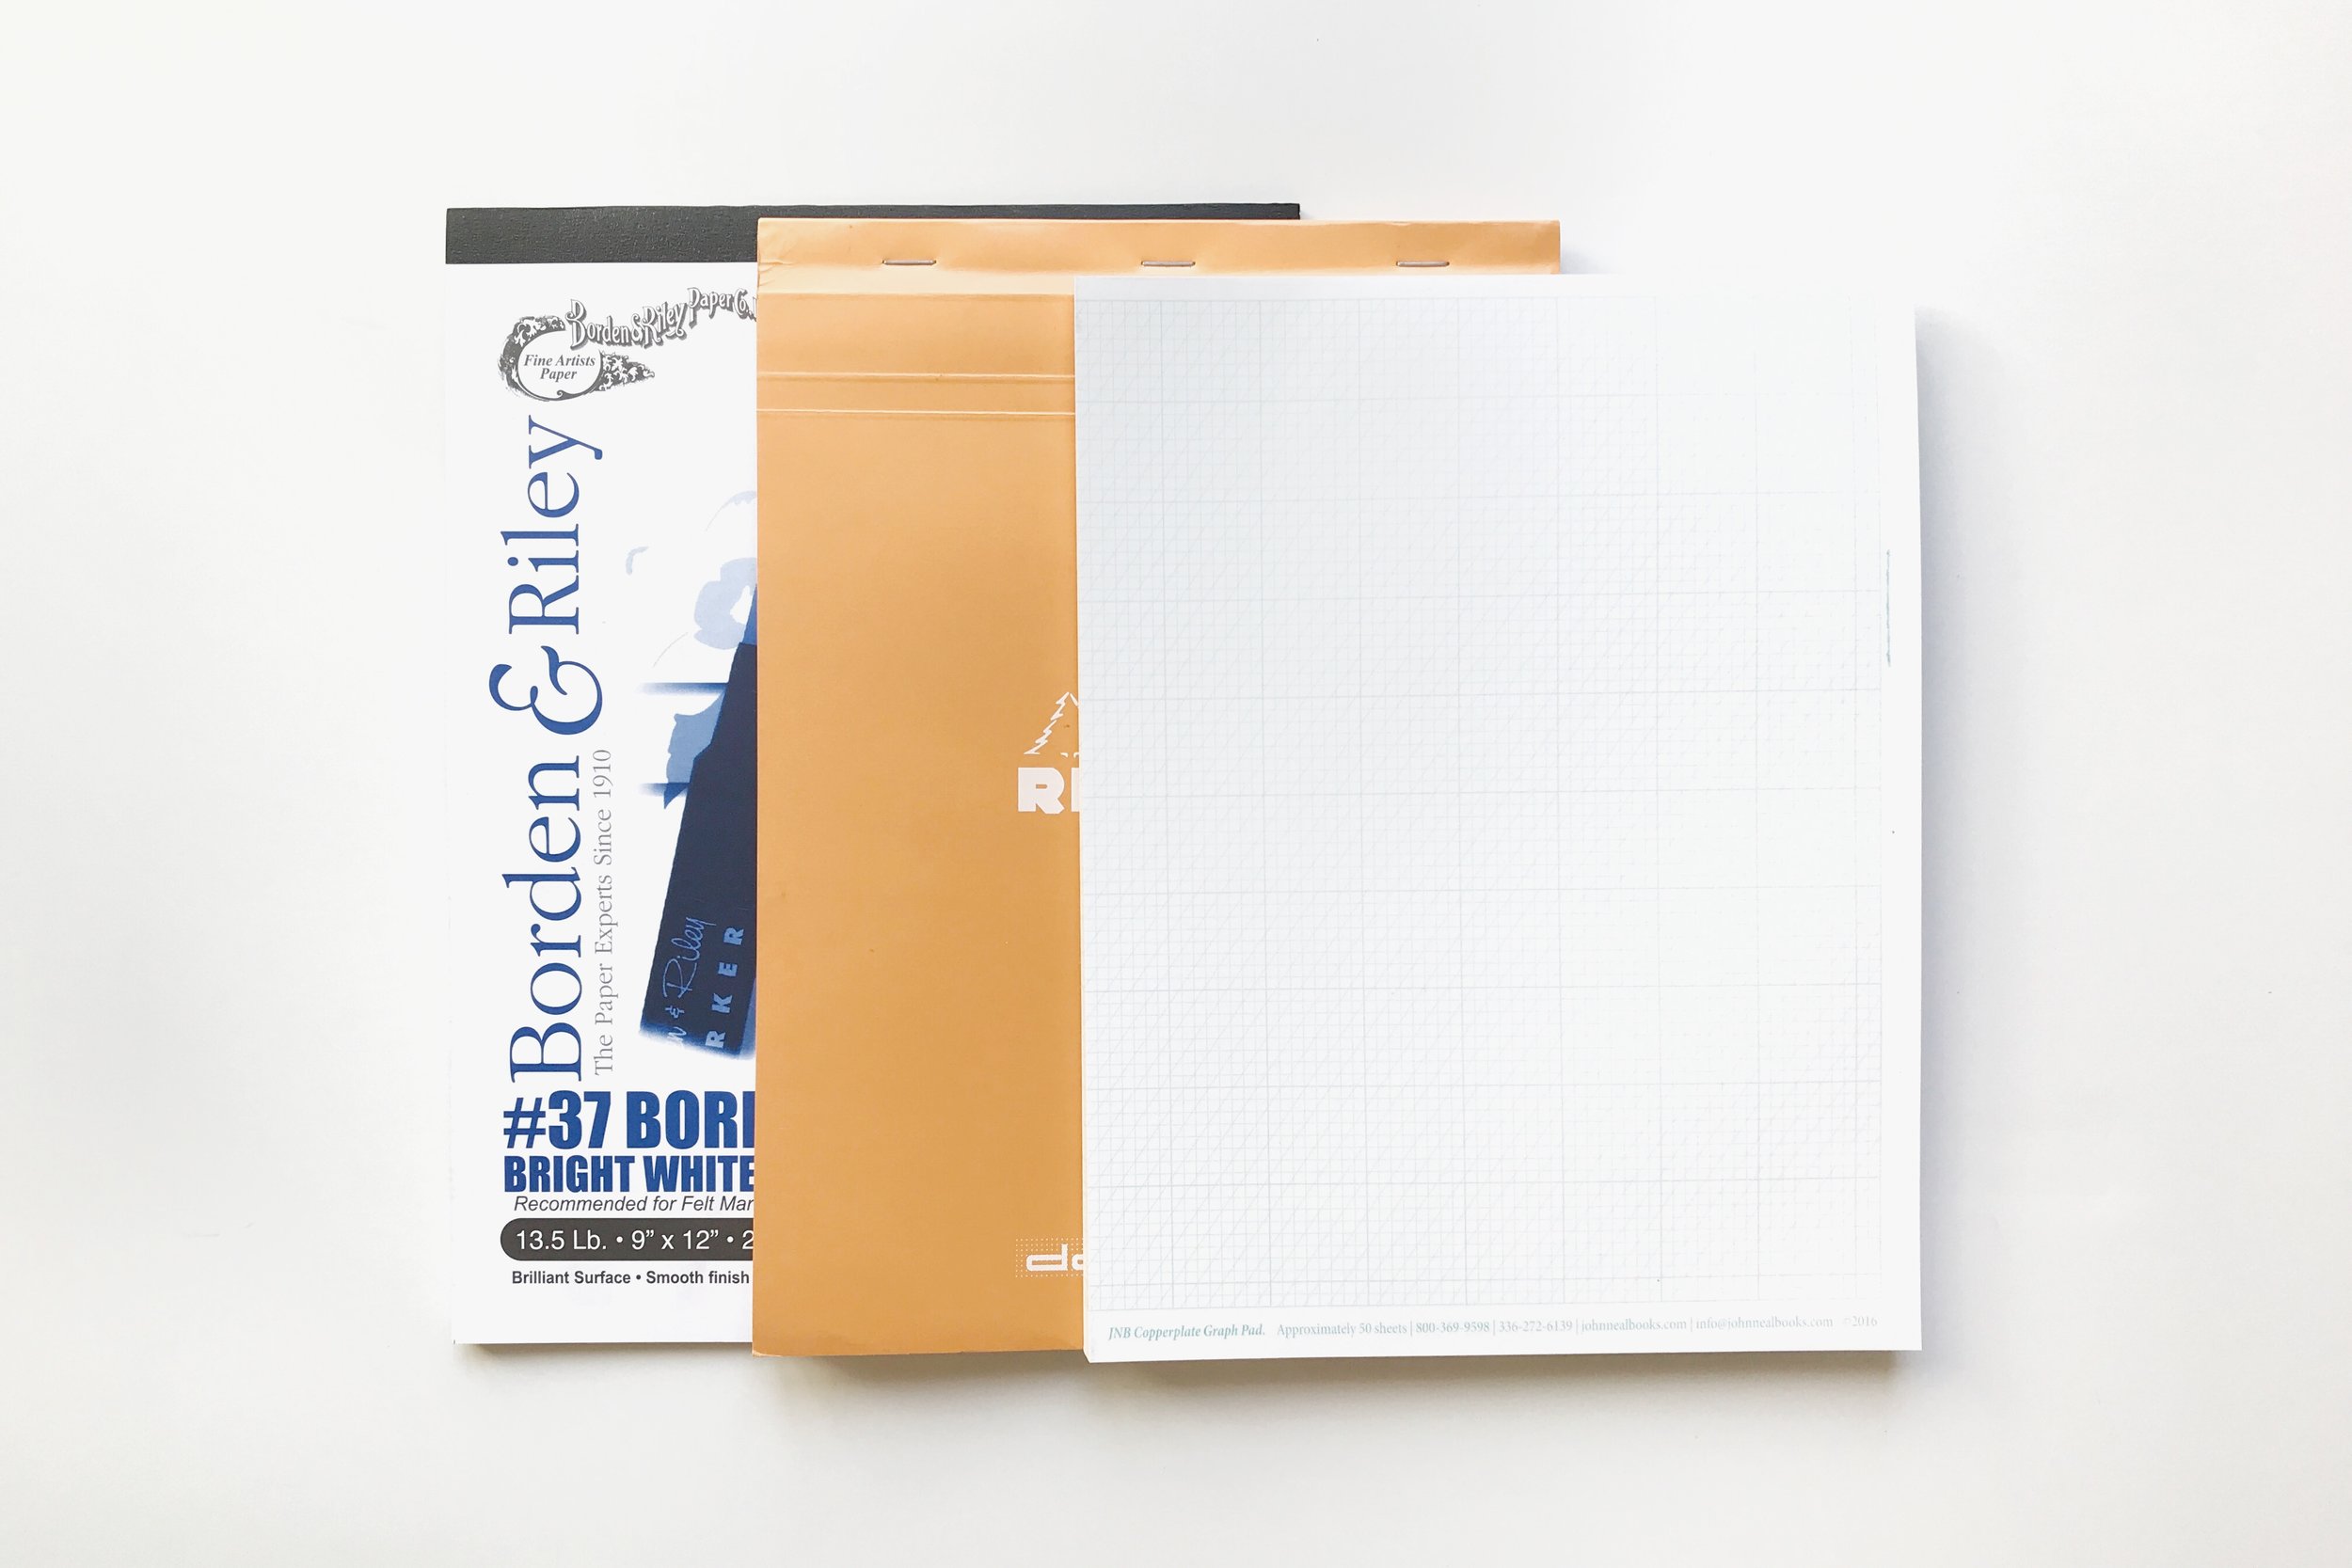
Paper Recommendations for Beginner Calligraphers (from left to right): Borden & Riley #37 Layout Paper, Rhodia Dot Paper, John Neal Books Copperplate Pad
Borden & Riley #37 Layout Paper - Tracing paper is another great tool, especially for building on sketches and other artwork for production. I also use this tracing paper often in my workshops - students lay the tracing paper on top of a sample stroke to trace or on a blank set of guidelines to maximize their practice space without having to constantly reprint blank guidelines.
Rhodia Dot Paper - This is a pretty popular recommendation because the paper is just SO luxuriously smooth. However, as practice paper, if you go through as many sheets as I do in one sitting, the costs add up so I actually try not to use it too often. I’m partial to the dot paper because you can keep your practice straight but also photograph a particular good iteration of your work without any background lines / dots showing up on the camera.
John Neal Books Copperplate Pad - This is the secret sauce to my copperplate practice - I love that the grid comes with pre-made slant lines to keep my letters consistent. The grid is printed in 24lb paper, which isn’t TOTALLY ideal, because depending on how sharp your nib is (say, a Leonardt Principle or the Hunt 101), it may pull out some fibers. However, with a Nikko G, this pad works really great. I use this grid often for planning and laying out custom commissions.
Ink Recommendations for Calligraphy Beginners

Ink Recommendations for Beginner Calligraphers: Walnut Ink Crystals (mix with water according to instructions), Moon Palace Sumi Ink
Moon Palace Sumi Ink - This is my favorite ink to practice with. I use this also for any spot calligraphy because it is super pigmented so my hairlines are more likely to be picked up by my scanner. It’s not acidic so it doesn’t degrade your nib, which is also a plus.
Walnut Ink - Do you ever want to take your calligraphy practice to your local coffee shop and wow everyone who walks by with your ninja calligraphy skills? Maybe you need a change of scenery to get your creative juices flowing or making your desk chair is just killing your back. I digress, but my point is that walnut ink is magical because you can get your practice on WITHOUT taking along a cup of art water to clean your nib every couple minutes. Where sumi ink dries and thickens on your nib, walnut ink is water based and can wipe right off with a good paper towel and you are on your way again. I typically buy walnut crystals, which is SUPER cheap, and just mix it with distilled water in a small jar. This way, you can adjust how pigmented you want your ink to be. However, if you prefer to go to the pre-mixed route, this walnut drawing ink works really well!
Pen & Nibs Recommendations for Calligraphy Beginners

Pen & Nib Recommendations for Beginner Calligraphers: Century Adjusted Oblique Holder, Nikko G Nib, Blue Pumpkin (Hiro 40) Nib
Blue Pumpkin - Also known as the Hiro 40, it is one of the early nibs I explored and has been a staple in my life. I use it often for reproduction work - it has a blunt tip and produces heavier lines, which is great if you’re going to be scanning and digitizing your work. It’s also great for modern calligraphy because it produces more of a marker-like stroke. The blunt tip also works well with thicker inks (like Dr. PH Martin’s Bleedproof White or any of the Spectralite metallics.)
Nikko G - This is my go-to practice nib. I started my pointed pen journey with the Nikko G because it was recommended to beginners by basically EVERYONE on the internet, and quickly found that I did NOT like it and moved on to the EF 66 and other nibs. However, more recently, I’ve seen the light when it comes to this nib. It’s like the everything-bagel of the nib world - it’s got your thin hairlines, your solid downstrokes and is built nice and sturdy so you don’t have to worry so much about damaging the tines. In the last couple months, I’ve pretty much used this nib exclusively in my practice and have really enjoyed it.
Century Adjusted Oblique Holder - This is my all time favorite pen. It’s not ideal on so many levels - it’s heavier than I thought I would have liked, it’s super dirty and rusty - but I love it so much because I’ve adjusted it to my grip and it’s the most comfortable pen I have. I’ve bought more expensive, more colorful, more trendy pen holders since, but this dirty, machine made one has my love through and through. My biggest recommendation for students is to pick up a cheap pair of pliers and adjust the pen to your grip because at the end of the day, it doesn’t matter the pen, so much as your comfort. As long as you know how the nib should hit the paper, you’ll be able to adjust the flange accordingly. (Put as simply and concisely as possible, the angle of the nib should hit the paper in such a way that when you pull your downstrokes, equal weight is placed on each tine.)
My favorite places to get supplies:
Amazon
John Neal Booksellers
Paper & Ink Arts